ISCSI Lun Recovery
I – When Do we Need Lun Recovery?
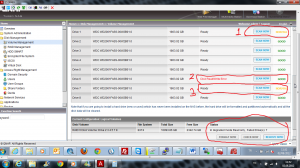
As you all know, When you loose 3 HDD from RAID 6 , you loose all of your datas, but Qnap has and advance Read-Only Feature that enables to backup your datas.
But, for ISCSI, it doesnt work. With this document, I’ll show you how to recover your ISCSI Luns. But we need 2 Qnap to recover.
II – ISCSI Lun Recovery Scenario 1:
Costumer lost 3 HDD on his RAID 6;
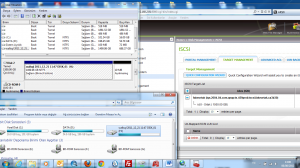
and even ISCSI targets& Luns seem good, ISCSI connection on windows failed, we got “no respond” error.
After a few hours of trying, I was able to reach his ISCSI back again, and here is how to document;
Must warn you, Qnapsupport Taiwan could only help after copying ISCSI luns to another Qnap, and I strongly advice you contact with them after ISCSI Lun copying finished If you’r new with Qnap & linux Commands.
So lets start;
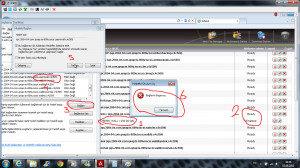
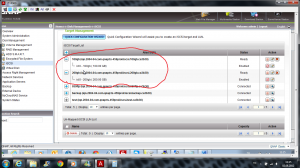
1 – First, create a new share folder on costumer device (169.254.100.100), and show path as his .@iscsi folder.
Also create a new network share folder on your Qnap (192.168.2.91)and show your .@iscsi folder
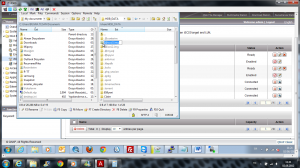
2 – just copy these luns to your Qnap .@iscsi folder. (from 169.254.100.100 to 192.168.2.91)
(Note : at this case, My Qnap (192.168.2.91) had 4 single disk volumes, and I directly copy these ISCSI luns to a random share folder name “859yeni” accidently. If you wonder how I solve with this build, please go on this document)
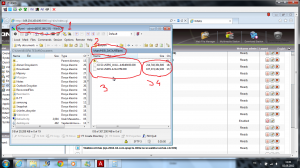
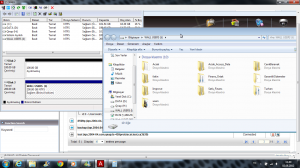
3 – I create a share folder at second HDD, so these luns are at my second HDD, so after login with winscp, folder destination is
/share/HDB_DATA – > and my iscsi Luns were under “859yeni” folder
(if I copied filse to 1.th hdd, destination would be /share/HDA_DATA)
(if I copied file to 3.th hdd, destination would be /share/HDC_DATA)
4 – Dont forget to take note of Lun names, and calculte their size;
first ISCSI Name : iSCSI-USERS_WALL-4d9d8b50
Size : 214,748,364,800 / 1024 / 1024 /1024 : 200 GB!
Second ISCSI Name : iSCSI-USERS-4c9c47f9
Size : 107,374,182,400 / 1024 / 1024 /1024 : 100 GB!
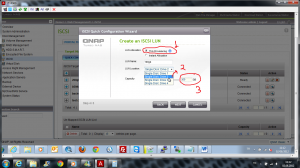
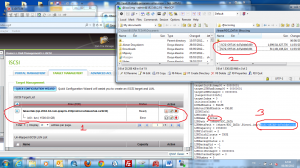
5 – Now, I’ll create 2 fake luns with “thin provision” on my 2.th HDD, and size are 200 gb and 100 gb.
6 – As I said I use 4 x single disk, and I have free size on my second HDD, so I create my ISCSI on second HDD! It will appears at share/HDB_DATA
Be sure our fake ISCSI Luns & Targets are created and online
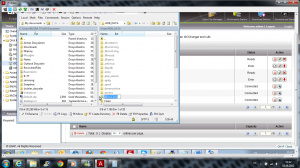
7 – Logout Winscp and Login again! Go to /share/HDB_DATA
As I said I accidently copy these files to a network share, not .@iscsi folder, so press and change your original .@iscsi.img name with .@iscsi.img3;
8 – Now I change my “859yeni” folder name with .@iscsi.img
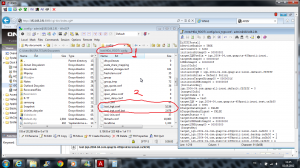
9 – Now, go /etc/config
(original path : /mnt/HDA_ROOT/.config)
Find and double click on iscsi_trgt.conf file.
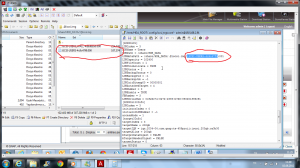
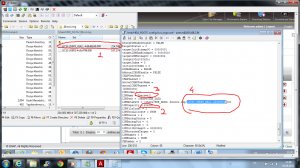
10 – Now find and change lun name “100gb”, and change LunMetapath name as your ISCSI lun.
Do the same to your second 200 gb Lun;
11 – Save & exit.
12 – Restart Qnap;
Try to reconnect your ISCSI via Window;
..and..
My 100 Gb ISCSI doesnt comes back, but no problem, costumer said he only need that 200 gb size lun. (I had one more 100 gb sized lun, probably Qnap couldnt recognize because of this. At this kind of cases, my advice is change your original .@iscsi.img name, backup your iscsi configration, then completlty remove your ISCSI lun & targets over Qnap. Fallow this document, and after recover datas, change everything back.
III – Recovering “2 part lun” Scenario
1 – Send ISCSI luns that want to recover to another folder on your other Qnap. After transfer compete, Calculate ISCSI lun size, create a fake Lun at the same size with “thin provision”. change original .@iscsi.img to another folder name (just like .@iscsi.img2), and change iscsi luns containing folder with .@iscsi.img
2 – Connect with wincsp, edit iscsi_trgt.conf with text editor under /etc/config. Change fake lun names (warning : not targer name) with your original Lun names.
3 – Simply Restart Qnap after this configurations;
Thats All;
If you got trouble, just contact with Qnap support Taiwan and asked that your ISCSI luns lost, They’ll mount iscsi back again.
