Firmware Reflash For Ts- x79 Series
Applied QNAP NAS models
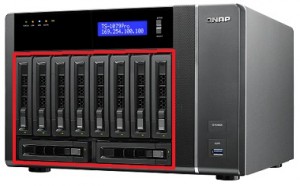
TS-879 Pro, TS-879U-RP, TS-1079 Pro, TS-1279U-RP, TS-EC879U-RP, TS-EC1279U-RP
When to use the firmware recovery guide
This firmware recovery guide is intended for users who encounter system startup failure due to incomplete or unsuccessful firmware update caused by power outage or network disconnection during the process. To verify if this guide applies to your NAS, follow the steps below:
1. Power off the NAS.
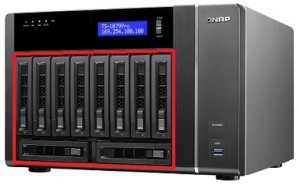
2. Remove all the hard disks.
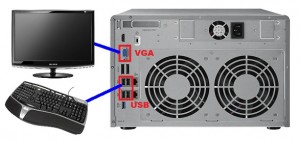
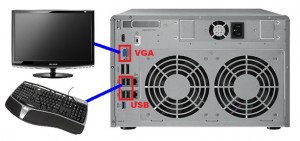
3. Connect the NAS with a VGA monitor and a USB keyboard.
4. Power on the NAS
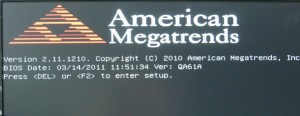
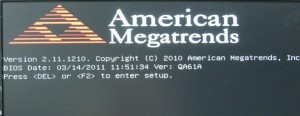
The BIOS Date and Version should be displayed. This shows the BIOS can startup correctly
If the BIOS cannot be started, you need to contact with local distributor and send back the NAS for repair. If the NAS system can be started up correctly after removing HDD, you will need to replace the HDD as the startup failed issue is caused by HDD.
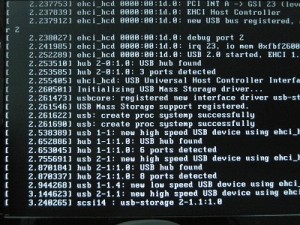
5. After the BIOS info, you will see status messages similar to below:
At this stage, the system on the DOM is starting to boot up. However, if the system is corrupted, some error message might occur on the screen during the startup process. You can try to recover the system on the DOM by following steps.
6. To recover the system on the DOM, you need follow the step A and step B.
A. Create a USB boot disk B. Use the USB boot disk to refresh the system on the DOM.
Instructions for NAS Recovery
A. How to create a USB boot disk.
1. Download the unetbootin utility and iso file from the link below: http://unetbootin.sourceforge.net/– e.g. please select “Download for windows” if you are using Windows platform on your PC. http://eu1.qnap.com/Storage/tsd/clonezilla-live-1.2.11-23-i486.iso
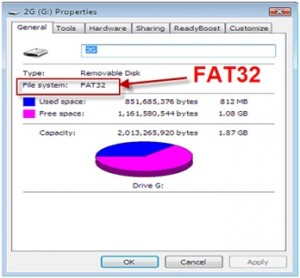
2. Plug a USB flash drive to your PC. The USB flash drive should be 1GB or 2GB. Please format the USB flash drive as FAT32.
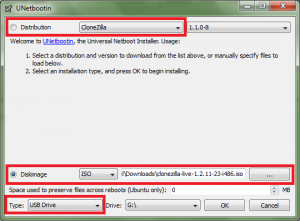
3. Run the unetbootin utility on your PC. Then select “CloneZilla” for Distribution.
4. Select “Diskimage”, and choose the iso file downloaded in step 1.
5. Make sure the Type is on “USB Drive”, and click “OK” to install the boot system on the USB drive.
6. Click “Exit” after process completed.
7. Check your NAS model and download the system full image from the link below.
8. Copy system image file to the root folder of USB flash drive and rename the file to “dom.img”.
Download System Full Image
========================================================
TS-879 Pro
TS-879U-RP, TS-EC879U-RP
TS-1079 Pro
TS-1279U-RP, TS-EC1279U-RP
TS-1679U-RP, TS-EC1679U-RP(make sure the file size is 515,899,392 bytes after download)
========================================================
B. How to use USB boot disk to refresh the DOM for TS-x79 series NAS
1. Power off the NAS.
2. Remove all the hard disks.
3. Connect the NAS with a VGA monitor, USB keyboard, and the bootable USB disk.
4. Power on the NAS and press the <DEL> or <F2> key when you see the message to enter setup.
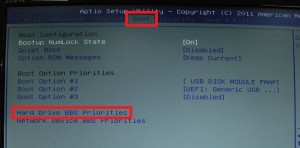
5. You will enter the BIOS Setup. Press the right arrow key to navigate to the Boot settings screen, and select “Hard Drive BBS Priorities”
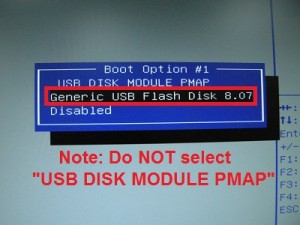
6. Select “Boot Option #1″
7. Select “Generic USB Flash Disk” or similar name showing your USB disk [NOTE]: If there are two USB devices, don’t select “USB DISK MODULE PMAP”.
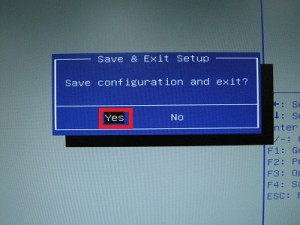
8. Press <F4> and select “Yes” to save and exit.
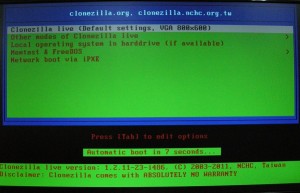
9. The CloneZilla loader will start up. Press <Enter>.
10. When asked to “Choose Language” and “Configuring Console-data”, press <Enter>
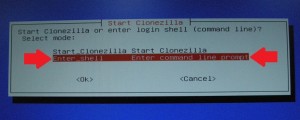
11. At the “Start Clonezilla” option, select “Enter_shell”. Press <Enter> twice.
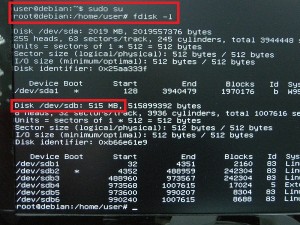
12. You will see the Linux command line. Enter the following commands: # sudo su # fdisk –l
/dev/sda is your flash drive. /dev/sdb is the DOM drive. The size should be 515 MB.
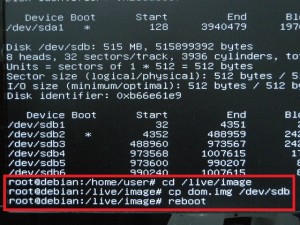
13. Then, input the following commands: # cd /live/image # cp dom.img /dev/sdb
“dom.img” is your firmware name. /dev/sdb is the drive name of the DOM.
14. Reboot your NAS. # reboot
15. After the system has been recovered, the NAS should boot up correctly and can be found by QNAP Finder.
16. Please download the latest firmware from the QNAP website and use QNAP Finder to update the firmware to latest version.
17. After firmware update by QNAP Finder, you can then plug the HDD(s) back to the NAS. After boot up:
- If the HDD(s) have been used on the NAS before, the firmware on the NAS and the HDDs may be inconsistent, you need to update the firmware again.
- If the HDD(s) is brand new, you can then start the initialization procedures.
How to do if the startup problem persists
If the startup problem persists after refresh the system on the DOM, please return the NAS to your local dealer or distributor for system repair immediately.

